Network security awareness is growing.
When it comes to traditional network security, most of it was about configuring a firewall based on IP addresses.
However, as more applications and systems are connected to the network, the security of network switches is also becoming more important.
As networks become more complex and interconnected, interest in the security settings of each switch is increasing.
The Aruba CX (AOS-CX) switch operating system provides security guidance for the Control Plane/Management Plane, including physical security.
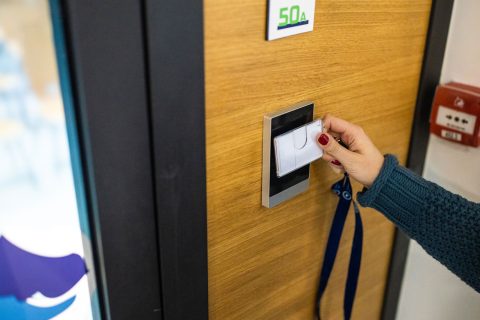
Physical security
Physical security refers to a security device that prevents unauthorized access to the actual switch equipment.
The front of the switch contains numerous ports and buttons. Touching these carelessly can cause major network issues or disruption.
Therefore, it is recommended to enable physical security features of the switch to prevent access by unauthorized users.
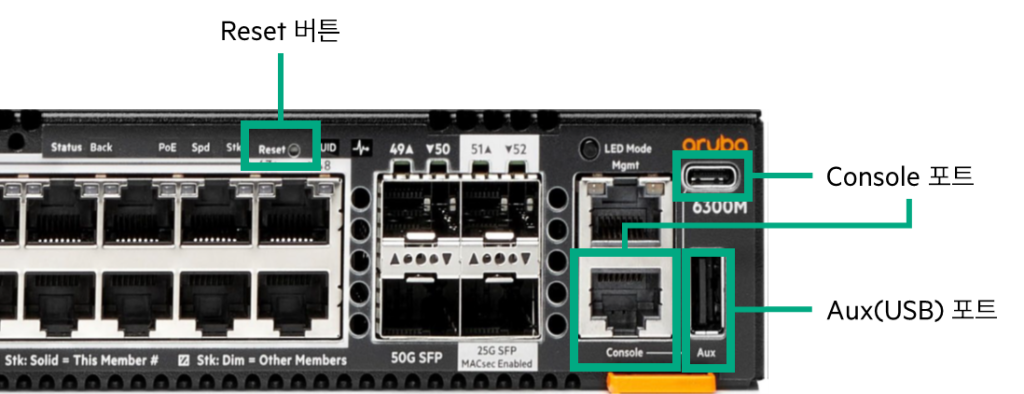
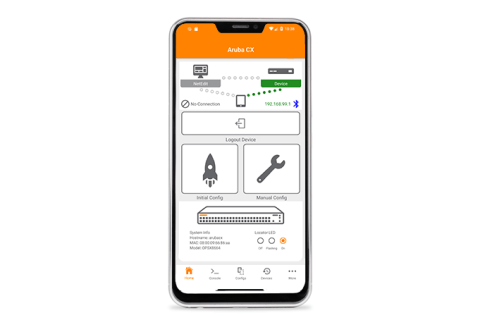
USB storage and Bluetooth adapter connection ports
It is recommended to disable the port if you are not using it.
When accessing the switch via Bluetooth, enable security authentication features (such as SSH) to prevent unauthorized access.
switch(config)# no usbReset button (Soft/Hard/Factory Reset)
Activate and use the Factory Reset feature when necessary.
switch(config)# front-panel-security factory-reset
This command will enable front-panel factory reset capability, where user can trigger factory-reset via reset button. This feature will remain enabled until it is disabled, or a factory-reset is performed. Continue (y/n)?
Console port (RJ-45 and USB-C ports)
Enable AAA functionality to allow access using local authentication or RADIUS, TACACS+, etc.
switch(config)# aaa authentication login console
switch(config)# aaa authorization commands console
switch(config)# aaa accounting all-mgmt console start-stop
Management Plane Security
Switch Security Operation Mode
The AOS-CX switch supports two operating modes:.
Used in general situations Standard Modeand the security of the OS has been strengthened Enhanced Secure ModeThere is.
switch(config)# secure-modeswitch(config)# secure-mode enhanced
This will set the switch into enhanced secure mode. Before enhanced secure mode is enabled, the switch must securely erase all customer data and reset to factory defaults. This will initiate a reboot and render the switch unavailable until the zeroization is complete. Continue (y/n)?There are no particular restrictions in Standard Mode, but the following restrictions exist in Enhanced Secure Mode:.
- Shell Mode access denied
- Restrictions on using the following commands in Service OS
- Config-clear: startup-config cannot be deleted
- Password: Set the administrator (admin) account password
- Sh: Run support shell mode
- Update: Firmware image update
This mode is recommended for use in financial, defense, and government organizations because it can restrict access to sensitive parts of the operating system.
Local user groups and role-based access control (RBAC)
The AOS-CX operating system manages users (accounts) by differentiating them according to their roles.
This means that you can restrict which commands can be used or which methods can be accessed based on the role.
This role-based access control is set up by creating user groups rather than setting it up for each user.
AOS-CX provides three user groups by default:.
- Administrators: No restrictions on CLI and REST API access.
- Operators: Restrict access via CLI and REST API to only display non-secure information. Secure pages are not accessible via the web UI.
- Auditors: CLI, REST API, and Web UI all have access only to audit-related content (System → Log).
The Privilege Level and Role name for each user are as shown in the table below.
| RBAC | Administrators | Operators | Auditors | |
| RADIUS | Aruba-Admin-Role | Administrators | Operators | Auditors |
| Aruba-Priv-Admin-User | 15 | 1 | 19 | |
| Service type | Administrative-User | NAS-Prompt-User | – | |
| TACACS | Aruba-Admin-Role | Administrators | Operators | Auditors |
| Priv-lvl | 15 | 1 | 19 | |
In addition to these three user groups, you can create additional user groups.
You can add up to 29 user groups, and define 1024 CLI rules for each group.
switch(config)# user-group ex1
switch(config-usr-grp-ex1)# 10 deny cli command "show aaa .*""
switch(config-usr-grp-ex1)# 20 permit cli command "show .*"
switch(config-usr-grp-ex1)# exit
Each rule that can be defined in a group is applied in the same numbering order as the firewall policy.
Looking at the command example above, it means that commands starting with show aaa cannot be used, but other show commands can be used.
Password Control
By setting up password authentication ServiceOScan enhance the security of your device.
Applying this setting will make you an admin user. ServiceOS When logging in to the Shell, you must enter the same admin password as in the CLI or Web UI.
switch(config)# system serviceos password-promptAnd to strengthen local user password security...
- By default, local users' passwords are displayed as Ciphertext.
- Passwords are hashed using SHA-512 with a salt.
And the Config file is stored encrypted with AES-256-GCM. - You can transfer passwords to other switches using the default or user-specified export key.
- Recommendations – Exchange passwords between switches using a newly specified key, not the default key.
switch(config)# sservice export-password
Enter password: ******** Confirm password: ******** switch(config)# show service export-password
Export password: custom
Password complexity rules
The ability to set password complexity enforces the application of complexity when setting passwords for local users.
When you enable this feature, the rules you set will be applied when creating a new user or changing their password.
The “ciphertext-password” command cannot be used when creating a new user or changing a password.
Because ciphertext passwords cannot verify password complexity.
The options available for creating complexity rules are:.
Switch(config)# password complexity
Switch(config-pwd-cplx)# ? adjacent-char-type-count Configure the maximum number of adjacent characters from a character set allowed disable Disable password complexity enforcement enable Enable password complexity enforcement history-count Configure the number of previous passwords checked to prevent reuse lowercase-count Configure the minimum lowercase character count minimum-length Configure the minimum password length numeric-count Configure the minimum numeric character count position-changes Configure the minimum number of positions that must differ in the new password special-char-count Configure the minimum special character count uppercase-count Configure the minimum uppercase character count
The default and configurable values for each option are shown in the table below.
| Rule name | Default | Configurable range |
|---|---|---|
| Minimul Length | 8 | 1 ~ 64 |
| Position Changes (number of characters that must be different from the previous password) | 8 | 1 ~ 64 |
| Password History (Remember previous passwords) | 5 | 1 ~ 5 |
| Minimum Numeric Character (Minimum Number of Numbers) | 1 | 0 ~ 64 |
| Minimum Lowercase Character | 1 | 0 ~ 64 |
| Minimum Uppercase Character | 1 | 0 ~ 64 |
| Minimum Special Character | 1 | 0 ~ 64 |
| Minimum Adjacent Character (minimum number of characters of the same type that can be adjacent) | 0 | 0 ~ 63 |
Reset Admin Password
If you cannot remember or have forgotten your switch admin password, you may need to reset it.
In this case, physically access the switch, connect the console cable, and then reboot the switch.
Select to boot into Service OS console mode when the switch reboots.
Boot Profiles: 0. Service OS Console
1. Primary Software Image [FL.10.13.0001BH] 2. Secondary Software Image [FL.10.13.0005C]
If you have not set up a password to access Service OS, you can reset the password.
SVOS> password
Enter password: ******** Confirm password: ********
If you are unable to log in by setting the Service OS password, you will need to perform a switch reset using the zeroize command.
ServiceOS login: zeroize
This will securely erase all customer data, including passwords, and reset the switch to factory defaults. This action requires proof of physical access via a USB drive. * Create a FAT32 formatted USB drive * Create a file in the root directory of the USB drive named zeroize.txt * Type the following serial number into the zeroize.txt file: xxxxxxxxxx * Insert the USB drive into the target module * Confirm the following prompt to continue Continue (y/n)?
AAA settings
If it's AAA on the network, Authentication, Authorization, AIt refers to ccounting (account management).
In other words, it can be said to be a technique to ensure a secure connection when a user or system accesses a network.
The AOS-CX operating system supports AAA security for remote access or console access via management interfaces such as SSH, Telnet, and Web UI.
| User Account Management | Local authentication | TACACS+ | RADIUS |
|---|---|---|---|
| Authentication | Yes | Yes | Yes |
| Authorization | Yes, RBAC | Yes, command-specific control and RBAC | No |
| Accounting | Yes | Yes | Yes |
To control access to the management interface for each connected user, please refer to the information below.
- By default, switch users can access the switch through any available management interface.
- To further refine and control commands, you can apply RBAC (Role-Based Access Control).
- When RBAC is applied, only CLI is possible and control over Web-UI or REST API requests is not possible.
- Below are recommended ways to provide users with specific management interfaces based on their user type:.
[Local Mode]
switch(config)# no user admin1 management-interface ssh
switch(config)# show user-list management-interface
USER ENABLED MANAGEMENT INTERFACE(S) ------------------------------------------------------------ admin ssh,telnet,https-sever,console admin1 telnet,https-server,console
[Remote RADIUS or TACACS+]
Aruba-User-Mgmt-Interface = "ssh,telnet,https-server,console""HPE provides guidelines for applying access control using AAA for each role.
As mentioned above, RBAC and command-specific authorization are only applicable to CLI and Web UI access.
Therefore, by exploiting these vulnerabilities, administrators can perform unauthorized actions via the REST API.
To prevent unauthorized operations and access, we recommend that you only allow access to the REST API for Automation Administrators.
- Network Admin: Allow network configuration operations
Aruba-Admin-Role = “network_admin” Aruba-User-Mgmt-Interface = "ssh,telnet,console"- Security Admin: Allow security configuration operations
Aruba-Admin-Role = “security_admin” Aruba-User-Mgmt-Interface = "ssh,telnet,console"- Automation Admin: Perform automated tasks via REST API
Aruba-Admin-Role = “automation_admin” Aruba-User-Mgmt-Interface = “https-server"SSH access security
To enhance security when connecting via SSH, we recommend configuring Cipher, MAC, and algorithm settings.
switch(config)# ssh ciphers aes128-ctr, aes256-ctr, aes128-cbc, aes256-cbc
switch(config)# ssh macs hmac-sha2-256, hmac-sha2-512, hmac-sha1
switch(config)# ssh key-exchange-algorithms ecdh-sha2-nistp256, ecdh-sha2-nistp384, diffie-hellman-group14-sha1
switch(config)# ssh host-key-algorithms ecdsa-sha2-nistp256, ecdsa-sha2-nistp384, ecdsa-sha2-nistp521
switch(config)# ssh public-key-algorithms ecdsa-sha2-nistp256, ecdsa-sha2-nistp384, ecdsa-sha2-nistp521
And when connecting via SSH, you can restrict the authentication key and set it to allow SSH connection only for specific clients.
The command to add a client public key is:.
Switch(config)# user admin authorized-key ecdsa-sha2-nistp256 E2VjZH...QUiCAk=root@switchRestricting the IP addresses of connecting clients is also one way to add security.
switch(config)# ssh server allow-list
switch(config-ssh-al)# ip 10.10.0.0/16
switch(config-ssh-al)# ipv6 fd10::0/64
switch(config-ssh-al)# enable
Active SSH sessions will be terminated. Do you want to continue (y/n)? y
switch(config-ssh-al)# exit
If you want to change the SSH connection port from the default TCP 22 to another port, use the command below.
switch(config)# ssh server port 19222Two-factor authentication
Logging in using only your ID and password can lead to account loss or theft, which could allow access by outsiders.
To prevent this, you can configure additional authentication devices to prevent unauthorized access.
Available two-factor authentication techniques for local users include:.
- Certificate (Local Authentication)
- Username in certificate (local authentication)
- Username and password (local or remote AAA server)
- Authorization (local or remote AAA server)
For remote users, the available two-factor authentication techniques are:.
- Certificate (Local Authentication)
- Username in certificate (RADIUS Authorized-Only request)
- Authorization (RADIUS)
- RadSec Only
| techniques | Local Only | Local + Remote | Remote Only |
|---|---|---|---|
| Management interface support | SSH | SSH | SSH & HTTPS |
| X.509 certificate authentication | Verified using a TA profile configured locally on the switch | Verified using a TA profile configured locally on the switch | Verified using a TA profile configured locally on the switch |
| Validate the user name in the certificate's common name or subject alternative name – User Subject Name | local user | local user | Remote RadSec Authorization Request |
| Username and password validation | local user | remote server | No validation |
| impression | local user | remote server | remote server |
Session Management
Session management refers to strengthening security by applying separate settings to CLI user sessions when connecting to the console or via SSH or Telnet.
switch(config)# cli-session
switch(config-cli-session)# max-per-user 1
switch(config-cli-session)# timeout 10
switch(config-cli-session)# tracking-range 25
The above config is recommended for security purposes.
- Allow only one CLI session per user
- The network timeout period is within 5 to 10 minutes.
And when you log in to the switch normally, it will tell you various information as below.
This allows you to see which users most recently accessed your site, when, and how (where).
Last login: 2025-04-23 08:06:57 from 16.242.163.65 User "admin" has logged in 36 times in the past 30 days switch#SNMP Access Security
SNMP (Simple Network Management Protocol) is one of the methods for easy management in large-scale network environments.
A protocol that monitors the main performance and functions of network equipment and notifies the administrator or configures specific parts when a failure occurs.
Therefore, SNMP is necessary for monitoring multiple network devices remotely, but security settings are also important.
The recommended security settings when configuring SNMP are as follows:.
- Do not set the SNMP Community value to the default value.
Switch(config)# snmp-server community zerotrust- Specify appropriate access rights and access lists.
switch(config-community)# access-level rw
switch(config-community)# access-list snmp_acl- To set up stronger security, disable SNMPv1 and SNMPv2 and use only SNMPv3.
switch(config)# snmp-server snmpv3-only- Uses secure authentication protocols (SHA224 or higher) and privacy protocols.
switch(config)# snmpv3 user myUser auth sha256 auth-pass plaintext myAuthPswrd priv aes256 priv-pass plaintext myPrivPswrd access-level roTime synchronization
Many security protocols and auditing features rely on system time.
And this time is synchronized with a management network or a trusted external time source.
One of the most commonly used protocols for this is NTP (Network Time Protocol).
Therefore, you must configure and enable NTP on your device before setting up the security management protocol.
Organizations spanning multiple time zones typically use NTP to synchronize time clocks and set each device's local time zone to UTC. This approach facilitates troubleshooting and security audits of devices that may be located across continents.
switch(config)# ntp authentication
switch(config)# ntp authentication-key 1 md5 ntpauthkey
switch(config)# ntp server 10.100.1.254 prefer
switch(config)# ntp vrf mgmt
Check your NTP server configuration show ntp servers You can check it through the command.
switch# show ntp servers
------------------------------------------------ NTP SERVER KEYID MINPOLL MAXPOLL OPTION VER ------------------------------------------------ 10.100.1.254 -- 6 10 none 4 prefer 10.80.2.219 -- 6 10 iburst 4 prefer(auto) pool.ntp.org -- 4 4 iburst 4 ------------------------------------------------
Control Plane Access Control List (ACL)
The Control Plane handles the management and routing functions of the equipment.
Therefore, when an IP address is bound to a VRF interface, the switch is exposed to the risk of being accessed by unauthorized users or devices.
To prevent these vulnerabilities, it is recommended to specify ACLs for the Control Plane of the corresponding VRF (default/non-default/mgmt).
It is especially recommended to set this for functions that cannot apply ACL policies, such as NTP.
switch(config)# access-list ip CONTROLPLANE
switch(config-acl-ip)# 05 comments ALLOW SSH AND SNMP ON ADMIN SUBNET, BLOCK ALL OTHERS
switch(config-acl-ip)# 10 permit tcp 10.10.0.0/24 any eq 22
switch(config-acl-ip)# 20 permit udp 10.10.0.0/24 any eq 161
switch(config-acl-ip)# 30 permit udp 10.10.0.0/24 any eq 162
switch(config-acl-ip)# 40 deny tcp any any eq 22 log count
switch(config-acl-ip)# 50 deny udp any any eq 161 log count
switch(config-acl-ip)# 60 deny udp any any eq 162 log count
switch(config-acl-ip)# 990 comments ALLOW ANYTHING ELSE
switch(config-acl-ip)# 1000 permit any any any
switch(config)# apply access-list ip CONTROLPLANE control-plane vrf defaultPKI Security
Administrators can manage digital signatures on the switch through the Public Key Infrastructure (PKI) feature.
The switch uses certificates to validate clients when acting as a server or communicating with a server using TLS encryption.
Applications that use PKI are as follows:.
- RadSec
- dot1x-supplicant
- EST Client
- Captive portal
- syslog
- https-server
AOS-CX switches support the following pre-installed Leaf certificates by default:.
- Local-cert: Self-Signed boot certificate – default certificate for all applications
- Device-Identity: Built-in when the switch is manufactured and used for 802.1x, MACsec, or Aruba cloud services.
To avoid potential security risks, AOS-CX recommends using trusted CA-signed certificates instead of self-signed certificates for all applications. To maintain the security and integrity of the certificate registration process, the minimum TLS version supported by AOS-CX switches is TLS1.2.
Per NDcPP, the peer certificate used to establish a TLS connection must have the Extended Key Usage field set to Client Authentication or Server Authentication, depending on the role of the peer device.
switch(config)# tls check-key-usageSo, we've looked at a guide to strengthening the security of your AOS-CX switch.
We've compiled information about physical security and security settings for the Management Plane.
In the next post, we will cover security settings for the Control Plane and the Supply Chain.