To use the Aruba AOS-CX simulator, you must first install an emulator such as EVE-NG.
If you haven't installed it yet, you can install it as a virtual machine using a hypervisor such as VMware or Hyper-V.
Please refer to my previous post for how to install on Hyper-V.
If you have successfully installed EVE-NG, you will now need to add images to decorate your virtual Lab.
EVE-NG supports the following Aruba products:.
- Aruba ClearPass
- Aruba CX Switch
- Aruba Mobility Controller
In addition, it supports various types of network equipment. For more information, EVE-NG homepageCheck it out here.
In addition, products that were provided as Virtual Appliances, such as NetEdit and Mobility Conductor (formerly Mobility Master), can be installed as VMs and linked with EVE-NG's Lab.
Download image
Before adding an image to your virtual Lab environment, you must first upload it to EVE-NG.
Download the image Aruba Support PortalIt can be downloaded from .
After logging in, go to Software & Documents and type “ArubaOS-CX ova“" and type:.
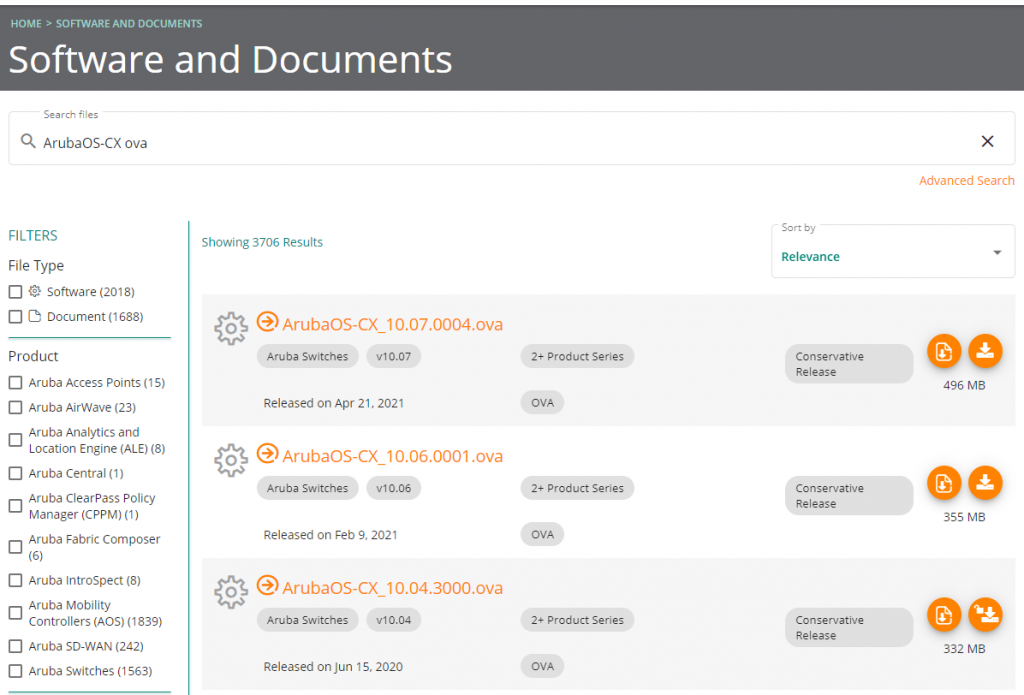
Click here to download the version you need.
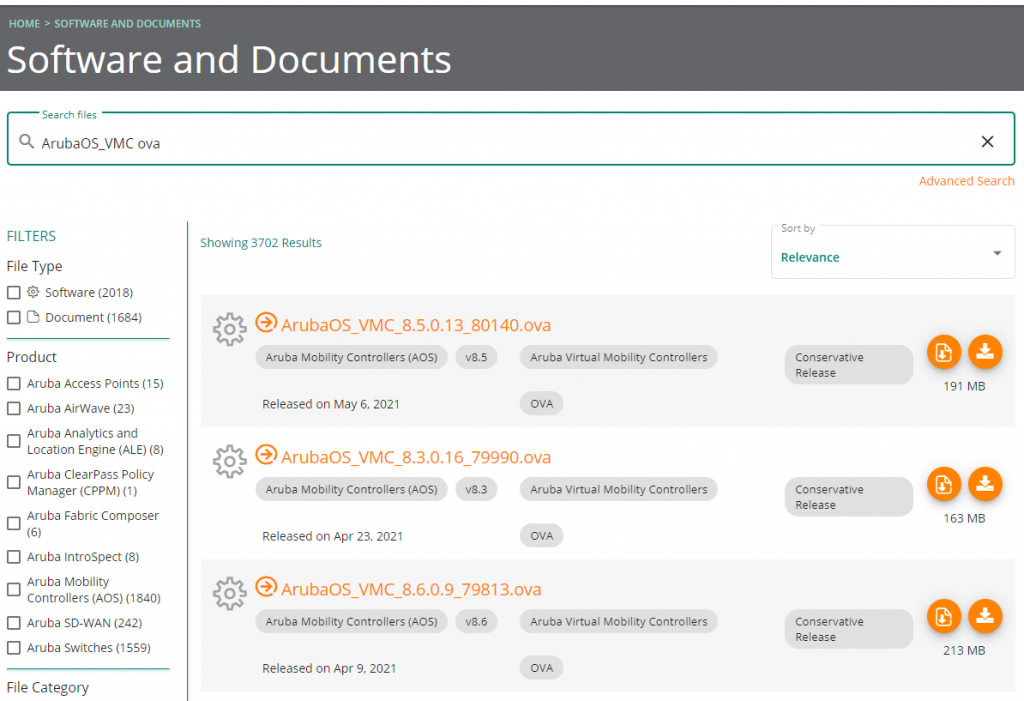
Mobility Controller also “ArubaOS_VMC ova“Search and download.
Finally, also download ClearPass. (“CPPM-VM KVM“Search by)
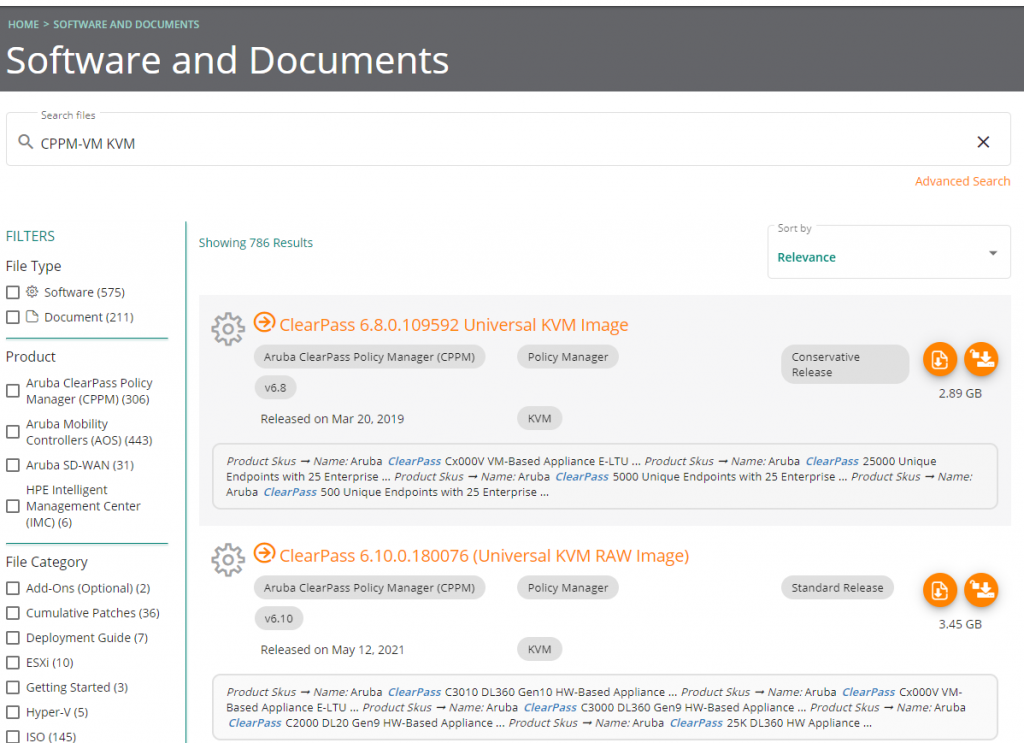
※ reference: ClearPass can be configured within EVE-NG Lab, but it can also be installed as a separate VM and linked.
When installing a separate VM, download the appropriate version for your hypervisor type.
– Hyper-V, ESXi, KVM, etc.
Upload image
Upload the downloaded image to the EVE-NG server. Uploading to the server Filezilla or WinSCPTransmit through applications such as .
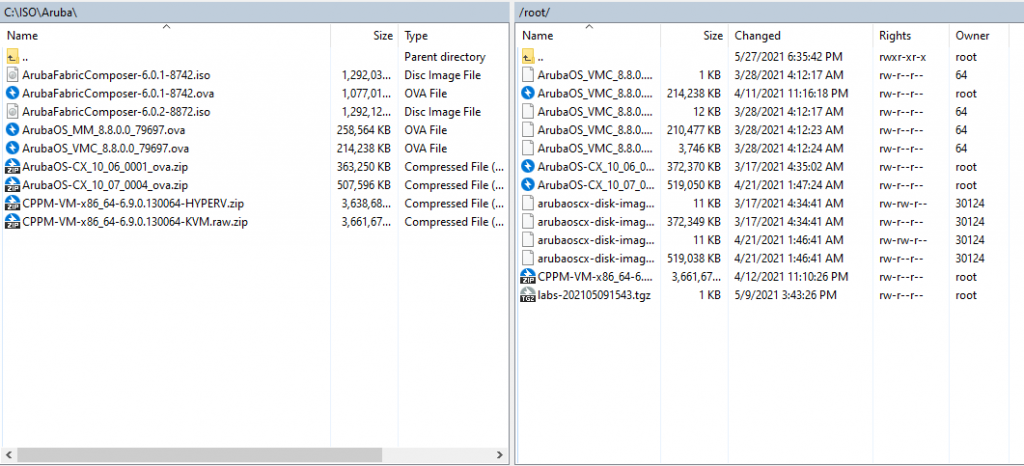
Installing the image
We unpack the image sent to the server and proceed with installation(?) and conversion so that it can be loaded by EVE-NG.
ArubaCX Switch
Unzip a ZIP file
root@eve-ng:~# unzip ArubaOS-CX_10_07_0004_ova.zip
Archive: ArubaOS-CX_10_07_0004_ova.zip inflating: ArubaOS-CX_10_07_0004.ova extracting: ArubaOS-CX_10_07_0004.ova.sig
Extract VMDK files from OVA files
root@eve-ng:~# tar xvf ArubaOS-CX_10_07_0004.ova
arubaoscx-disk-image-genericx86-p4-20210420160538.ovf arubaoscx-disk-image-genericx86-p4-20210420160538.vmdk
Convert VMDK file to qcow2 file format
root@eve-ng:~# /opt/qemu/bin/qemu-img convert -f vmdk -O qcow2 arubaoscx-disk-image-genericx86-p4-20210420160538.vmdk virtioa.qcow2

root@eve-ng:~# ls ArubaOS-CX_10_07_0004.ova arubaoscx-disk-image-genericx86-p4- 20210420160538.ovf ArubaOS-CX_10_07_0004_ova.zip ArubaOS-CX_10_07_0004.ova.sig arubaoscx-disk-image-genericx86-p4- 20210420160538.vmdk virtioa.qcow2
Create a new image folder and move the qcow2 files
root@eve-ng:~# mkdir /opt/unetlab/addons/qemu/arubacx-10.07
root@eve-ng:~# mv virtioa.qcow2 /opt/unetlab/addons/qemu/arubacx-10.07/
Modify permissions
root@eve-ng:~# /opt/unetlab/wrappers/unl_wrapper -a fixpermissionsVirtual Mobility Controller
Extract VMDK files from OVA files
root@eve-ng:~# tar xf ArubaOS_VMC_8.8.0.0_79697.ova
ArubaOS_VMC_8.8.0.0_79697.ovf ArubaOS_VMC_8.8.0.0_79697-disk1.vmdk ArubaOS_VMC_8.8.0.0_79697-disk2.vmdk
Convert VMDK file to qcow2 file format
root@eve-ng:~# /opt/qemu/bin/qemu-img convert -f vmdk -O qcow2 ArubaOS_VMC_8.8.0.0_79697-disk1.vmdk hda.qcow2
root@eve-ng:~# /opt/qemu/bin/qemu-img convert -f vmdk -O qcow2 ArubaOS_VMC_8.8.0.0_79697-disk2.vmdk hdb.qcow2
Create a new image folder and move the qcow2 files
root@eve-ng:~# mkdir -p /opt/unetlab/addons/qemu/aruba-VMC-8.8.0.0-79697
root@eve-ng:~# mv hda.qcow2 /opt/unetlab/addons/qemu/aruba-VMC-8.8.0.0-79697/
root@eve-ng:~# mv hdb.qcow2 /opt/unetlab/addons/qemu/aruba-VMC-8.8.0.0-79697/
Modify permissions
root@eve-ng:~# /opt/unetlab/wrappers/unl_wrapper -a fixpermissionsClearPass
Unzip a ZIP file
root@eve-ng:~# unzip CPPM-VM-x86_64-6.9.0.130064-KVM.raw.zip
Archive: CPPM-VM-x86_64-6.9.0.130064-KVM.raw.zip inflating: home/jenkins/KVMImage/CPPM-VM-x86_64-6.9.0.130064-KVM.raw
Convert VMDK file to qcow2 file format
root@eve-ng:~# cd home/jenkins/KVMImage/
root@eve-ng:~# qemu-img convert -f raw -O qcow2 CPPM-VM-x86_64-6.9.0.130064-KVM.raw hda.qcow2
Create a second HDD (100GB)
root@eve-ng:~# /opt/qemu/bin/qemu-img create -f qcow2 hdb.qcow2 100G
Create a new image folder and move the qcow2 files
root@eve-ng:~# mkdir /opt/unetlab/addons/qemu/clearpass-6.9.0.130064
root@eve-ng:~# mv hda.qcow2 /opt/unetlab/addons/qemu/clearpass-6.9.0.130064/
root@eve-ng:~# mv hdb.qcow2 /opt/unetlab/addons/qemu/clearpass-6.9.0.130064/
Modify permissions
root@eve-ng:~# /opt/unetlab/wrappers/unl_wrapper -a fixpermissionsInstalling the Aruba Icon
Download the file from the link below (requires Airheads Community membership)
Unzip and copy the PNG file to the location below (using WinSCP, etc.)
/opt/unetlab/html/images/icons
Virtual Lab Configuration
Log in to EVE-NG and create a new Lab.
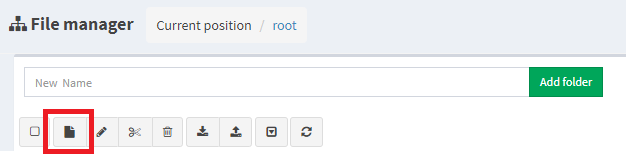
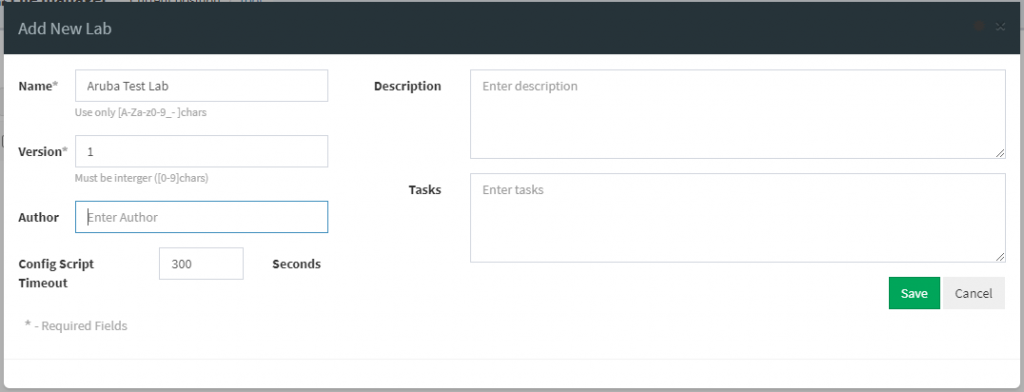
Now that we've created the Lab, let's add a switch.
Click the “+” icon in the left menu and select “Node”.
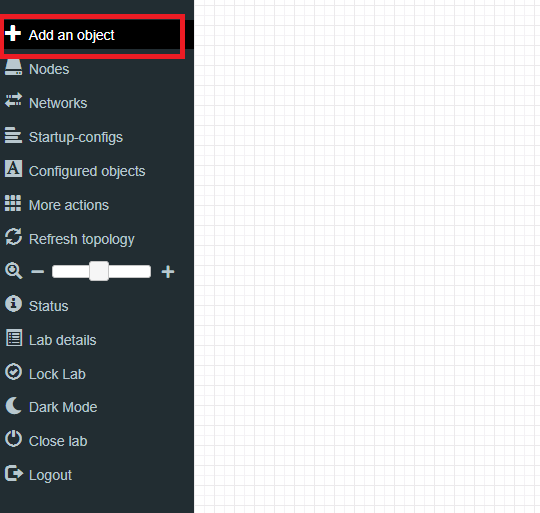
Let's choose an ArubaCX switch.
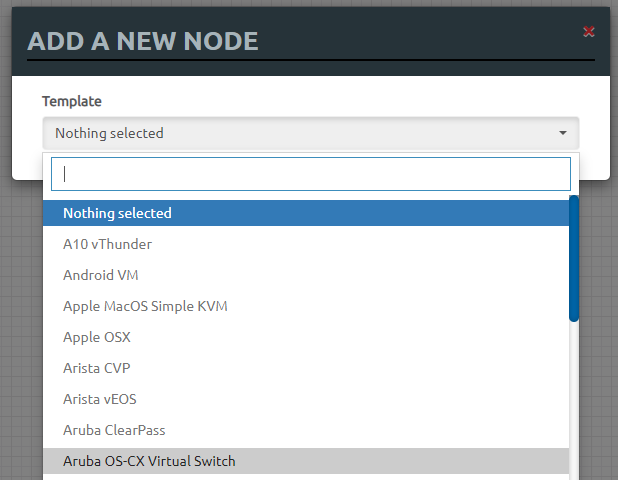
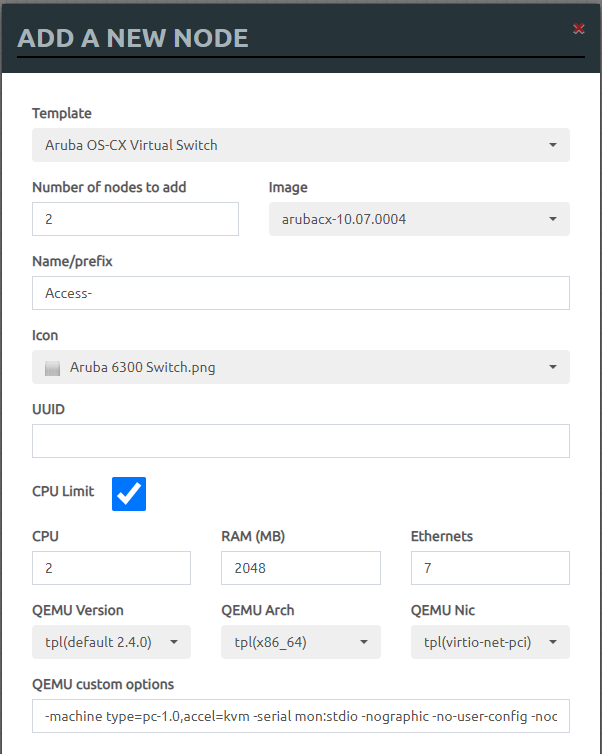
After creating the switch node, you now need to configure the network.
Click the “+” button on the left again and select [Add an object] → [Network] to create a network.
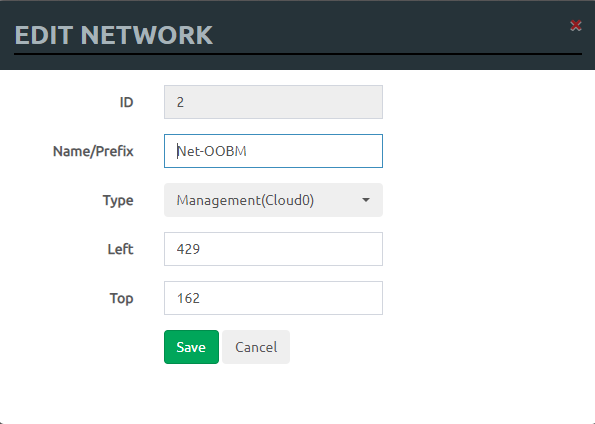
Now that we have created a network, let's connect the switch and the network.
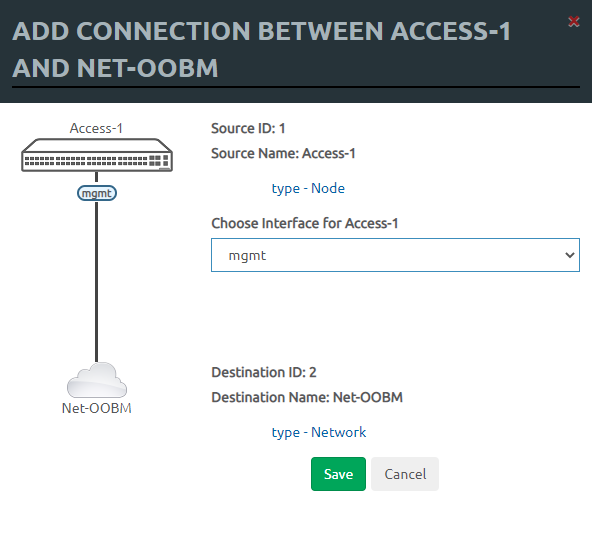
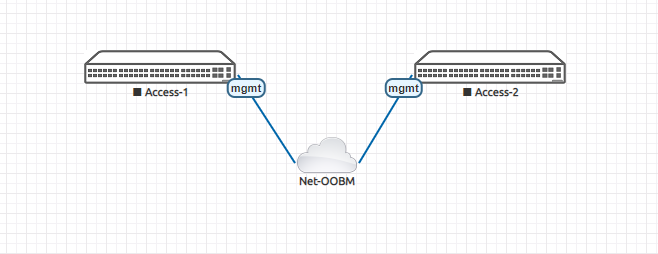
Connect the network like this and click the switch to press the [Start] button.
The switch will boot, and clicking on it again will bring up a console window.
When booting for the first time, log in as admin / [empty] on the Switch login screen.
switch login: admin Password: Then, you will be asked to set a password, and you can set a new password there.
Please configure the 'admin' user account password. Enter new password: ********
Confirm new password: ********
switch#
Now you can configure various lab environments and conduct tests.
For more detailed information, please refer to the document below and follow along.
To the Airheads Community AOS-CX Switch Simulator If you follow the link, you will find examples and samples for various lab environments. If you actively utilize them, it will be of great help in learning Aruba products.