In the last post, I introduced the AOS-CX simulator.
The AOS-CX simulator can be run through emulators like EVE-NG or GNS3. Today, we'll look at installing it using EVE-NG.
EVE-NG is a very powerful network virtualization emulator that allows you to use network equipment from various manufacturers as if it were real. For more information, eve-ng homepageYou can check it at .
If you look at the installation documentation on the EVE-NG homepage, you can see that installation is possible in various environments.
However, unfortunately, Hyper-V, which is provided by default in Windows 10 Professional or Windows Server, is not officially supported.
So today, I'm going to show you how to install EVE-NG using Windows Hyper-V, rather than a hypervisor like VMware or ESX.
1. Check prerequisites
This assumes that the Hyper-V service is installed properly on your laptop, PC, or server.
If you are not familiar with Hyper-V or are wondering how to install and configure it, see below. Microsoft official sitePlease refer to .
– https://docs.microsoft.com/ko-kr/virtualization/hyper-v-on-windows/
You should also check that your system meets the requirements to install and run EVE-NG.
Please check the specifications through the link below.
– http://www.eve-ng.net/documentation/installation/system-requirement
2. Install Ubuntu
Ubuntu 18 version is not supported, so please refer to the Ubuntu site. Download the ISO file of Ubuntu 16.04 LTS Yes, I recommend the server image over the desktop version.
http://releases.ubuntu.com/16.04/
- Now create a new VM in Hyper-V.
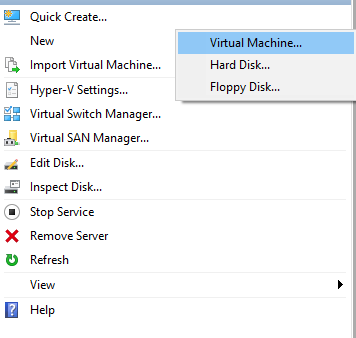
- Create VM
- Name: EVE-NG
- Generation: 2nd generation
- Memory: At least 8GB recommended (dynamic memory enabled)
- Networking: Select a vSwitch that is connected to the Internet (must be connected to the Internet)
- Hard Disk: Select a new virtual hard disk. (Choose an appropriate capacity—you can adjust it later.)
- Installation Image: Select the downloaded Ubuntu 16.04 LTS image file (ISO).
- Once the VM is created, right click on it and go to Settings to disable Secure Boot
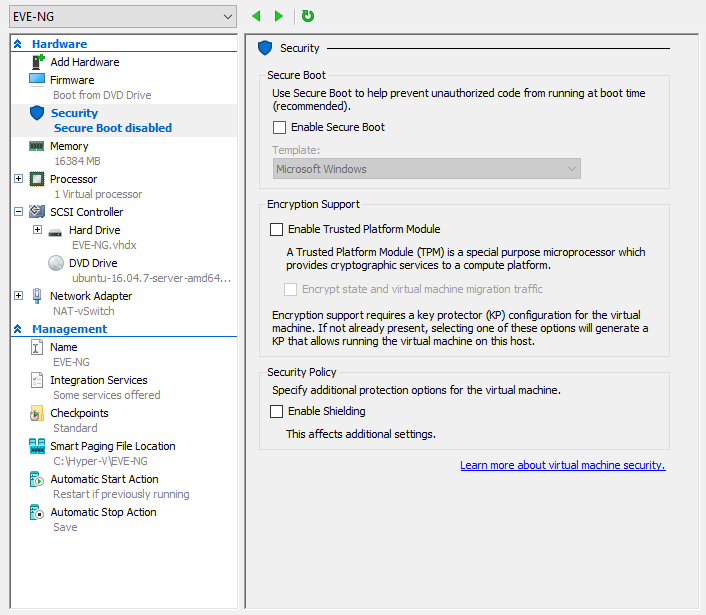
- Change the number of virtual CPU processors – adjust to suit your PC specifications.
- Enable MAC address spoofing for your network adapter (Network Adapter → Advanced Features)
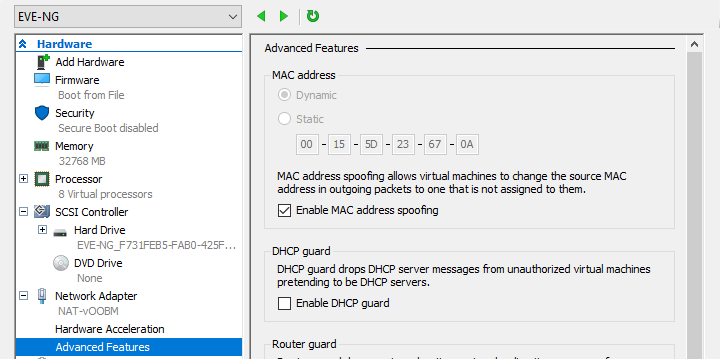
- Run the VM after saving the settings
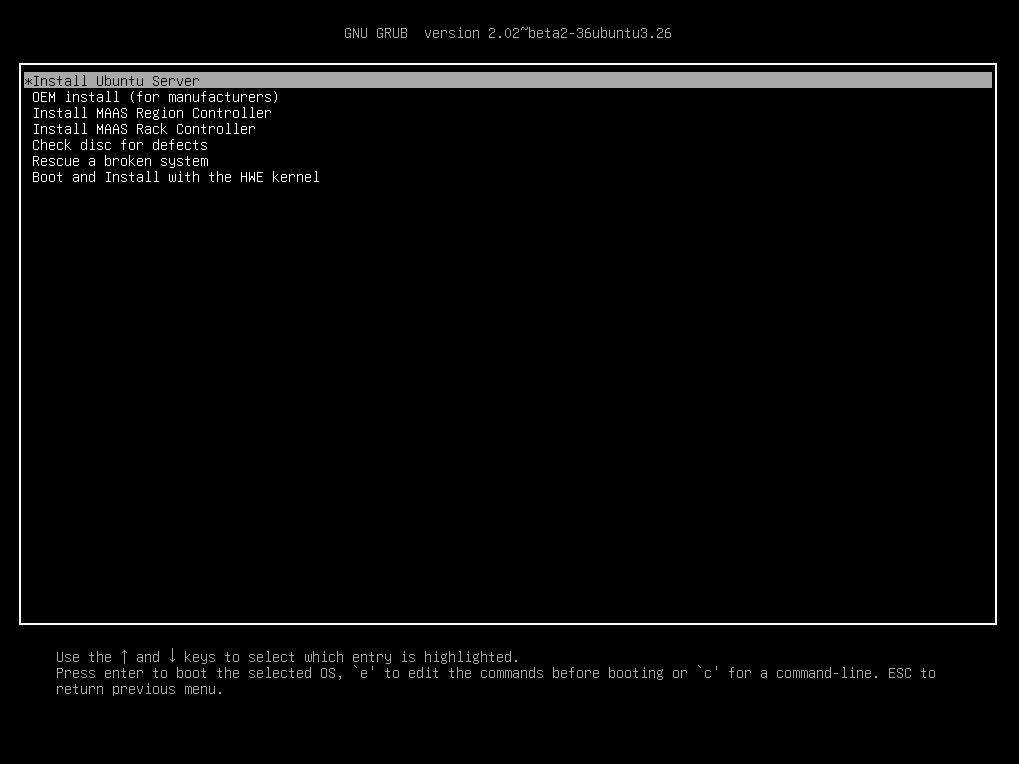
- Ubuntu Installation Options
- Language: english
- Location: Korea
- Configure Keyboard: Choosing the right keyboard
- Configure Network: Select DHCP or enter the appropriate network address
- Hostname: eve-ng
- Domain Name: Write anything (e.g. aruba.local or example.com)
- Full Name of User: Create your desired User Name
- Encrypt your home directory? NO
- Configure Clock: Check if the time zone is correct (Asia/Seoul)
- Partitioning Method: Select use entire disk and setup LVM
- Select disk to partition: Because there is only one disk select
- Write the changes to disk and configure LVM? YES
- Amount of volume: Automatically select the entire disk size
- Force UEFI Installation? YES
- Write the changes to disk? YES
- HTTP proxy information: If you don't have a proxy, leave it blank. select
- Configure Task: Select Install security updates automatically
- Software Selection: *importance* Select OpenSSH Server (select with spacebar)
- Reboot
3. Pre-installation work for EVE-NG
After rebooting, log in with the UserName and Password you created earlier.
Ubuntu 16.04.7 LTS eve-ng tty1 eve-ng login: <Username>
Password: <Password>

Welcome to Ubuntu 16.04.7 LTS (GNU/Linux 4.4.0-186-generic x86_64) * Documentation: https://help.ubuntu.com * Management: https://landscape.canonical.com * Support: https://ubuntu.com/advantage 109 packages can be updated 78 updates are security updates ..... ------- Omitted ------- ..... To run a command as administrator (user "root"), use "sudo ". See "man sudo_root" for details. aruba@eve-ng:~$
Log in as root.
<Username>@eve-ng:~$ sudo su
[sudo] password for <Username>: <Password>
root@eve-ng:~#
Change the password for the root account.
root@eve-ng:~# sudo passwd root
Enter new UNIX password: eve
Retype new UNIX password: eve
passwd: password updated successfully root@eve-ng:~#
Modify the host file using the VI editor.
root@eve-ng:~# vi /etc/hosts

127.0.0.1 localhost 127.0.1.1 eve-ng.example.com eve-ng
Enable SSH login as root account (Optional)
root@eve-ng:~# vi /etc/ssh/sshd_config

Change:
PermitRootLogin prohibit-password
To:
PermitRootLogin yes
Restart the SSH service
root@eve-ng:~# service ssh restart
4. Install EVE-NG
Before installing EVE-NG, you need to ensure a working internet connection. Use the ping command to check if you can connect to the external internet.
root@eve-ng:~# ping google.com
PING google.com (172.217.161.46) 56(84) bytes of data. 64 bytes from nrt12s23-in-f14.1e100.net (172.217.161.46): icmp_seq=1 ttl=111 time=59.1 ms 64 bytes from nrt12s23-in-f14.1e100.net (172.217.161.46): icmp_seq=2 ttl=111 time=59.3 ms 64 bytes from nrt12s23-in-f14.1e100.net (172.217.161.46): icmp_seq=3 ttl=111 time=60.3 ms ^C
Now, make sure you are logged in as root for the installation and type the following:.
root@eve-ng:~# wget -O - http://www.eve-ng.net/repo/install-eve.sh | bash -iThen the file will be downloaded and installed by an automatic script.
Once the installation is complete, reboot using the reboot command. After rebooting, you may see the following warning, which we'll address later.
WARNING: neither Intel VT-x or AMD-V found
After booting is complete and you log in as root, the eve-ng configuration screen will appear as shown below.
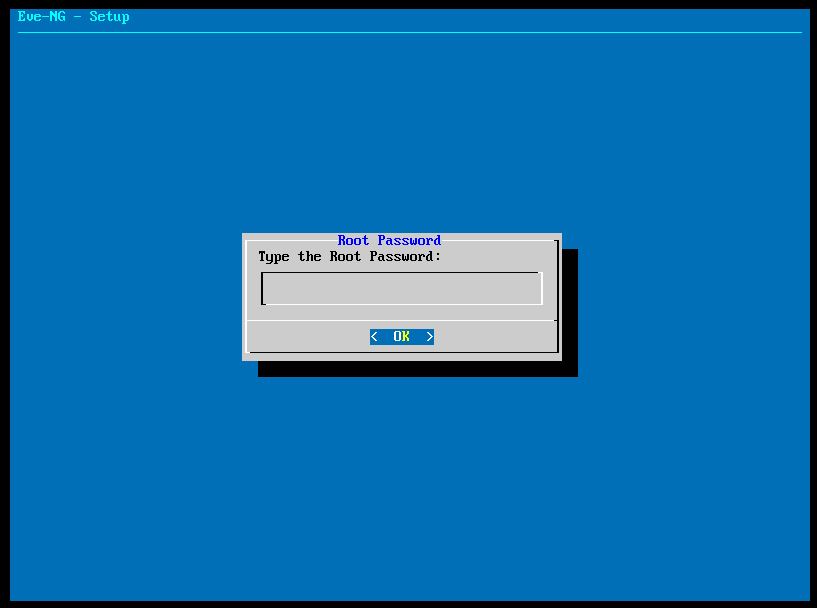
You can proceed with the related settings through the URL below.
https://www.eve-ng.net/index.php/documentation/installation/howto-configure-eve-during-first-boot/
Once setup is complete, it will reboot automatically.
After rebooting, update the package to the latest version and exit.
root@eve-ng:~# apt-get update
(...omitted...) root@eve-ng:~# apt-get upgrade
(...omitted...) root@eve-ng:~# shutdown now
Now we need to address the WARNING message from earlier.
This message occurs because EVE-NG, another virtual emulator, runs on top of a hypervisor called Hyper-V.
This can be resolved by setting up nested virtualization.
Run PowerShell as administrator.
Assuming that you named the created VM “EVE-NG”, enter the following:.
> Set-VMProcessor -VMName "EVE-NG" -ExposeVirtualizationExtensions $True
When you restart the VM, you will no longer see “WARNING: neither Intel VT-x or AMD-V found“The message will not appear.
Once the VM boots, if you enter the IP address you set into your browser, the login screen will appear normally.
- Username: admin
- Password: eve
EVE-NG installation is finally complete. In the next post, we'll add images and configure the Lab.