Once you've onboarded your devices to Aruba Central and mapped them to subscriptions, you need to actually manage them, starting with device configuration.
To manage devices and generate reports more efficiently, Aruba Central manages them in three ways:.
- Group
- Label
- Site
By appropriately utilizing these three methods, you can manage and monitor devices and terminals connected to Central.
Network Structure Page
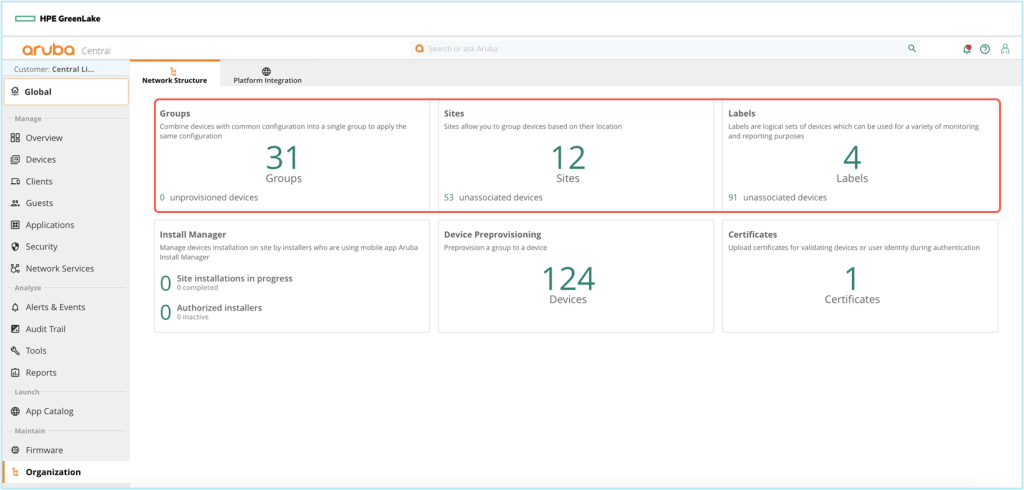
In the Central left menu OrganizationIf you select Network Structure The page is displayed.
This page displays information in tile format for the Groups, Sites, Labels, Installation Manager, and Certificates sections.
Each tile displays the following:.
- Groups: Shows the number of current groups and the number of unprovisioned devices.
- Sites: Shows the number of sites and the number of unconnected devices.
- Labels: Shows the number of devices not connected to the label.
- Install Manager: Displays the number of site installations in progress or completed, and the number of authorized installers.
- Certificates: Displays the number of available certificates.
Group
GroupIt acts as a container for managing and monitoring the device, as well as maintaining it. Key Componentsno see.
Administrators can efficiently configure and manage devices with similar requirements using a UI-based configuration workflow or a CLI-based configuration template editor through this grouping.
The group of devices provides the following:.
- You can provision multiple devices at once in a single group.
For example, you can configure multiple Instant AP virtual controllers (VCs) as a single group. These VCs share common configuration settings and can push configuration updates to each member Instant AP in the cluster.
Alternatively, you can apply separate security policies only to devices deployed in specific regions. - A single group can provision different types of devices.
For example, it can be configured in various ways as an Instant AP, gateway, or switch. - You can create a Config Base and add devices as needed.
When you assign a new device to a group, the configuration information applied to the current group is inherited. - You can create a clone of an existing group.
You can create a clone of an existing group and customize it according to your policies and requirements.
The main purpose of the group
The main purpose of the group is to simplify the composition.
All devices in the same group will receive the same configuration. Alternatively, you can use groups for monitoring.
When you select a group to monitor, only devices belonging to that group will be displayed.
APs display SSIDs based on their group membership and configuration. Switches and gateways inherit the configuration of the group they belong to.
Each device can belong to only one group at a time.
If you want all APs to advertise the same SSID, you only need one group.
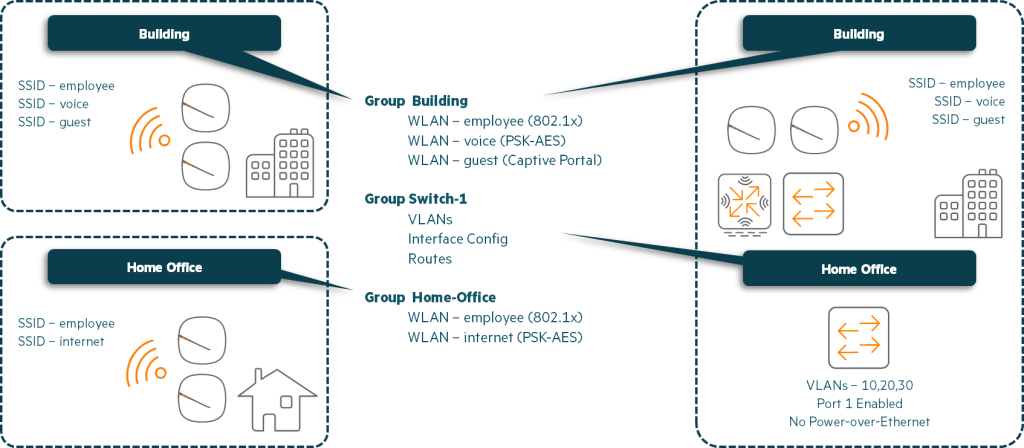
The picture above is “Building” Shows an AP group named .
In this scenario, the AP employee, voice 및 guest It must support three SSIDs.
Other APs in other buildings also require the same configuration, so both APs are placed in the same group.
Since some employees' homes have a micro-branch configuration, the scenario Home Office There is a group.
In this group employee Supports an SSID called . This SSID configuration securely tunnels corporate traffic to the office.
Internet SSID configuration directs your traffic to the Internet.
Also, the above figure shows the configuration of Aruba switches within the building. Group Switch-1 Also included.
Types of groups
UI Group
The UI group is the group that performs device configuration using the web interface (GUI).
You can customize and manage configuration parameters using UI workflows.
For example, you can configure Instant APs in a UI group using the menu options under Organization > Groups.
Template Group
Template groups allow you to manage device configuration information through CLI-based configuration (Config) templates.
You can combine devices with similar configuration requirements into a single template group and apply a common configuration template to these devices.
Default group
The default group is a system-defined group consisting of devices that run the factory default configuration.
When a new device connects to Aruba Central, it is automatically added to the default group and receives factory-applied default configuration values.
Using the default group to receive default configuration information for new devices allows network administrators to easily find and provision those devices.
Why is my device showing as unprovisioned?
→ When connected to Aruba Central with a Config applied to the device, the device is marked as unprovisioned.
To maintain that configuration information, you can create a new group and assign this device to that group.
If you want to overwrite the configuration, simply assign the device to another existing group.
Group Roles (Persona)
A device persona represents a device's role in a network deployment. A group persona indicates which types of devices and features can be used and managed within the group.
Creating personas for your devices helps you customize configuration workflows, automate parts of the configuration, and display default configurations and relevant settings for the device. Persona configurations also help you customize monitoring screens and tailor workflows to your devices.
Create a persona
When you create a group, you can create a persona.
Personas and architecture can be set at the group level. All devices within a group inherit the same persona from the group settings.
When creating a group, you can mark the current group's architecture and persona settings as the default settings for subsequent groups. For subsequent groups, you can automatically apply the default settings or manually select settings for the new group.
Depending on the device persona selected in the group, the Device Configuration page will only display specific device tabs for that group.
For example, if a group has only an Access Point persona assigned to it, the Device Configuration page for that group will only display the Access Points tab.
The supported architectures for group creation are:
- ArubaOS 8: Architecture based on Instant AP, such as Aruba InstantOS 6.x, 8.x (IAP, IAP-VPN) or InstantOS 8.x SD-Branch
- ArubaOS 10: AOS 10-based architectures, including AP-only underlay, AP+gateway overlay, Microbranch, or AOS 10.x SD-Branch.
Device personas can be applied to both ArubaOS 10 and ArubaOS 8 architectures.
All ArubaOS 8 personas also apply to ArubaOS 10 deployments. However, the ArubaOS 10 architecture supports some additional personas that do not apply to ArubaOS 8.
Persona workflows vary depending on the deployment type.
※ reference: ArubaOS 8 and ArubaOS 10 devices cannot be managed in one group.
As part of the group creation process, an ArubaOS version is selected. All devices in the group must adhere to the group persona.
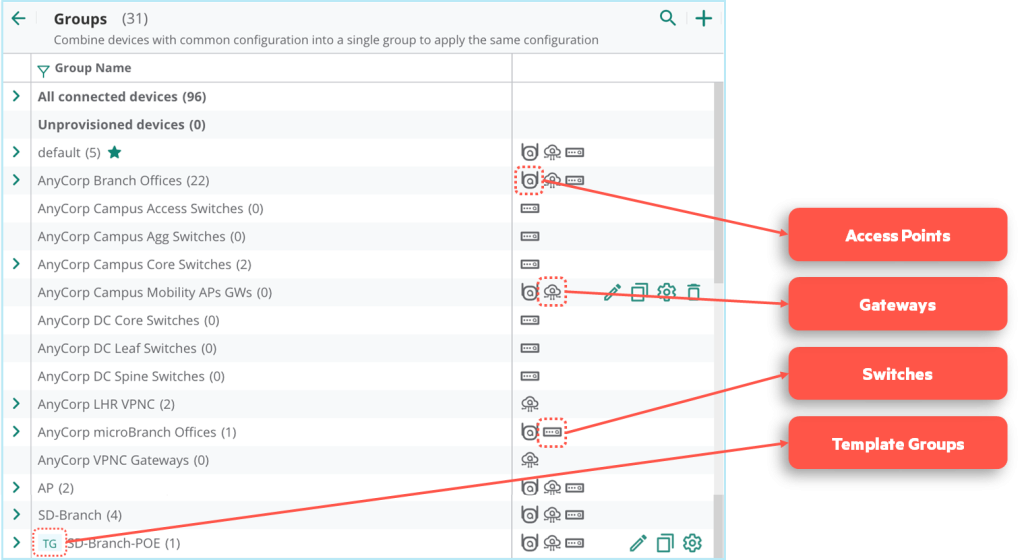
Create a group
To create a group, click the plus (+) sign in the upper right corner of the group page.
On the Add Group wizard screen, enter a group name and select the device types to include in this group.
The group supports the following device types:
- Access Point
- Gateway
- switch
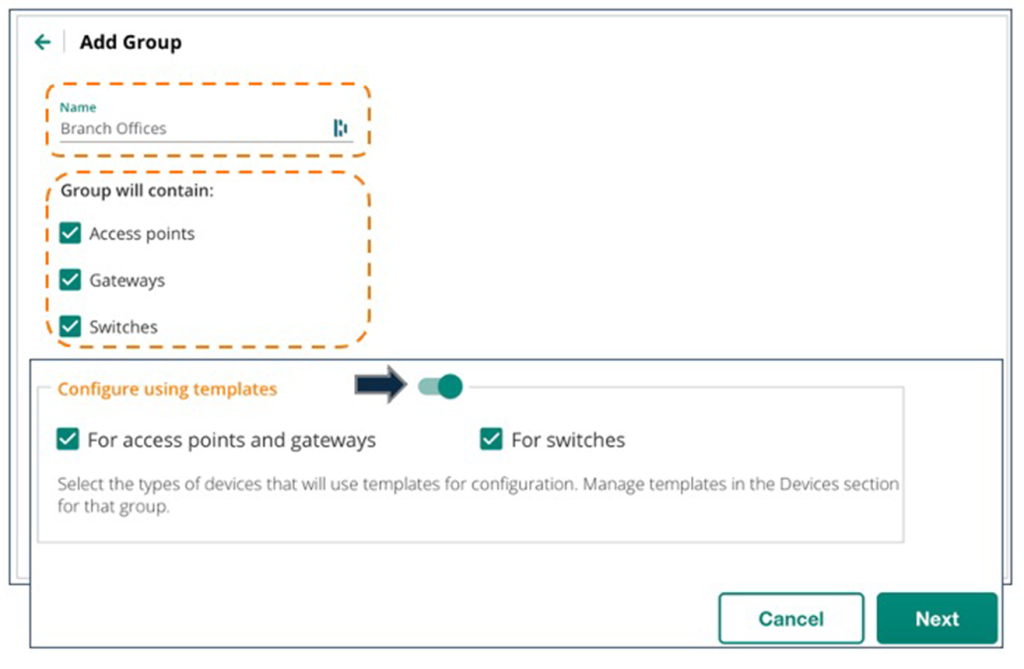
Aruba Central natively supports UI-based configuration.
To configure based on templates, enable “Configure using templates” using the toggle button, then select the device types in the group that you want to manage using templates.
Within a group, there can be a UI group or a template group depending on the device type.
For example, there is a UI group for access points and gateways and a template group for switches.
This gives network administrators the flexibility to choose which management interface type to use for each device type within a group.
※ reference: After creating a group, you can choose between UI groups and template groups. Cannot change group typePlease note that:.
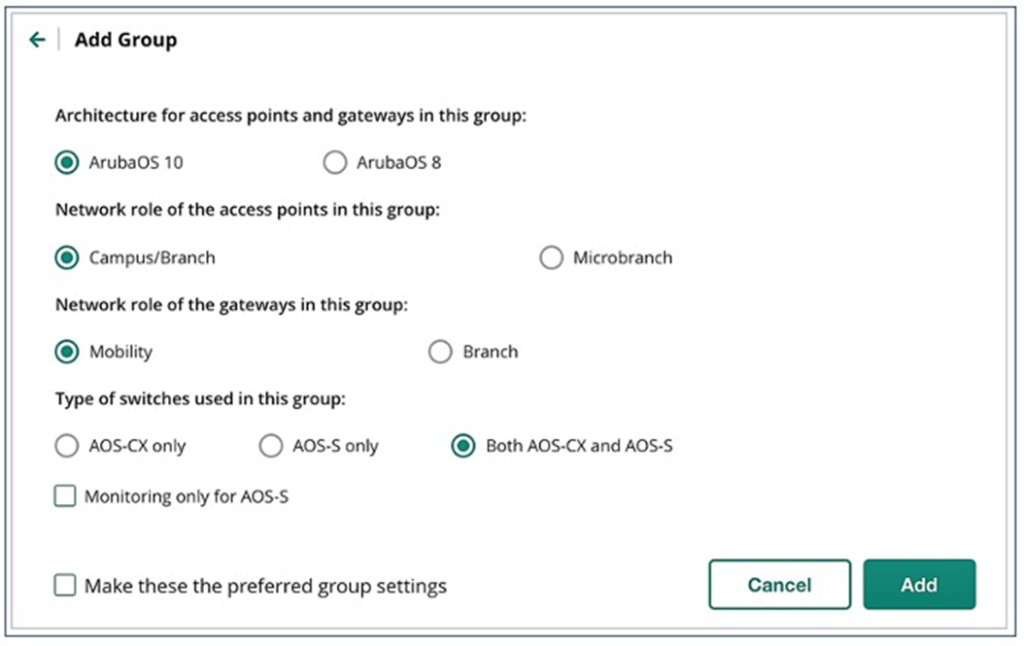
When you click Next, you will be asked to select a group persona by selecting the architecture for each device type.
It's important to remember that the choices you make while creating a group will affect configuration options at the group and device levels.
After you create a group, you cannot change the group persona.
For example, if you selected ArubaOS 8 when creating a group, the only way to manage ArubaOS 10 devices is to create a new group with the AOS 10 architecture.
Moving devices in a group
On the Groups page, you can select devices and move them between groups.
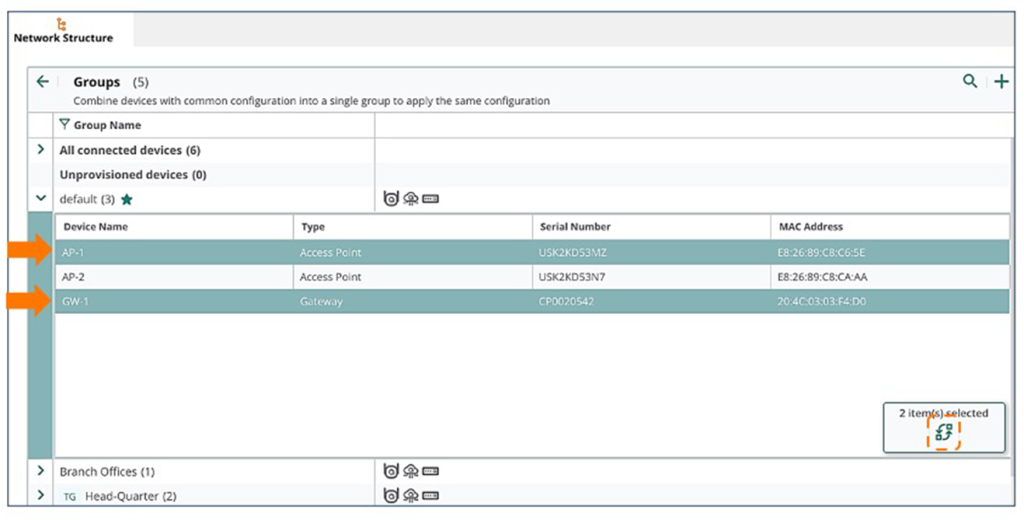
For example, if you expand the “Unprovisioned devices” group, select a device, and then click the Move Device icon at the bottom, the Move Device page will appear.
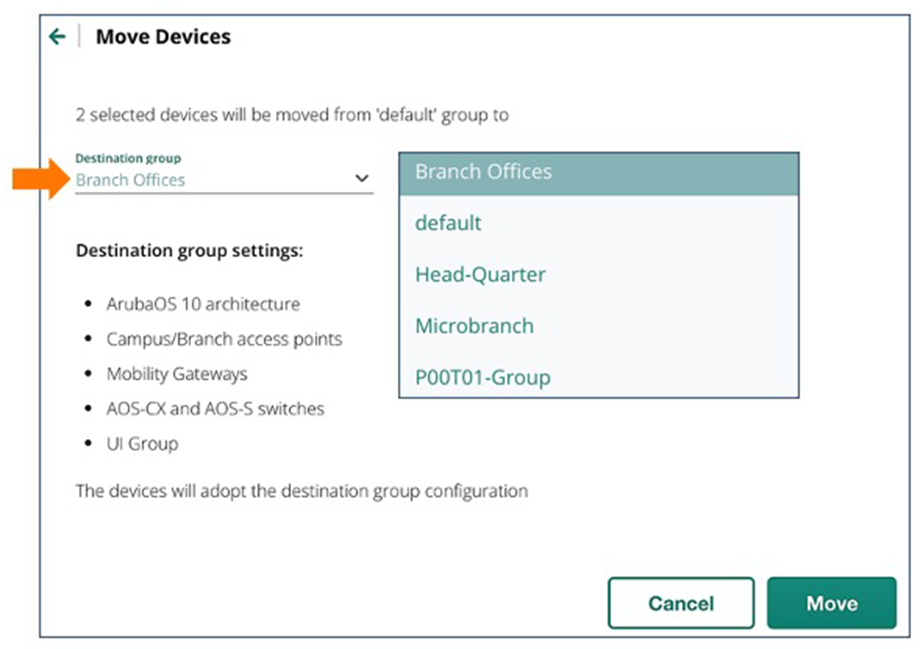
On the Move Device page, select the target group from the drop-down list and click Move.
The selected devices will be moved to the target group and the Config for that group will be downloaded.
※ reference: When moving devices between groups, the group config is reloaded and inherited.
That is, it clears the current configuration information from the device and downloads a new Config.
Aruba Central has three ways to manage devices:.
However, the method of managing through Groups is the most commonly used and convenient from the administrator's perspective.
In this post, we looked at groups and how to create and manage them.
Next, we will learn about the remaining management methods: Site and Label.