In the last post, we learned about the device management methods provided by Aruba Central.
Among the three methods: Group, Site, and Label, I checked Group.
This time, we'll look at the remaining two methods: sites and labels.
Site
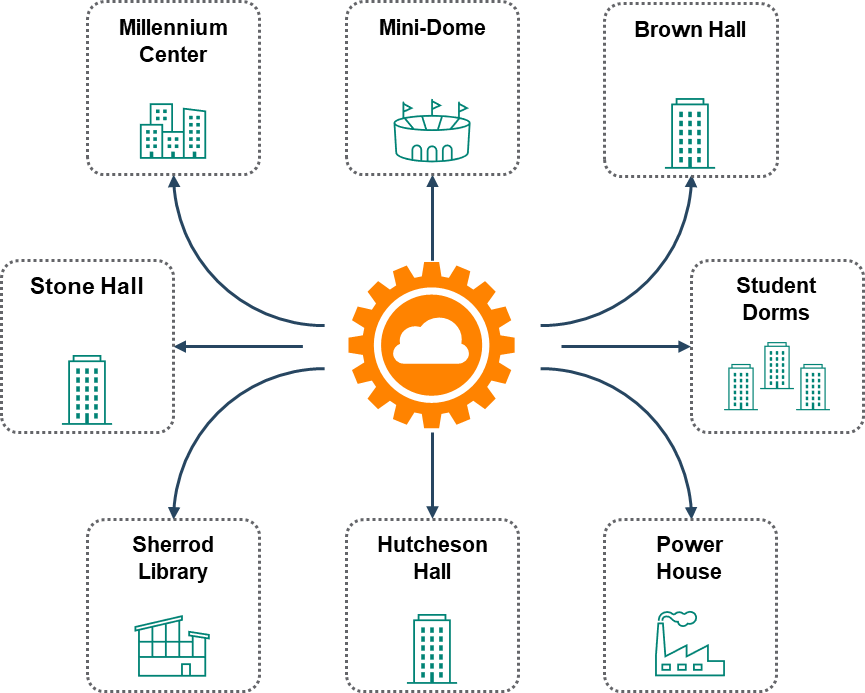
A site is a place such as a campus, branch, or location. Refers to the physical location where a series of devices are installeddo.
The site is more than just a tool for filtering views, placing devices on a map, and generating reports.
Several services are available through the site, including Live Upgrade, AirMatch, Installer Manager, Network Status Dashboard, and UXI.
Aruba Central allows you to use sites as the primary navigation element.
For example, if the device is deployed on campus: Campus A You can create a site called .
Using Label Campus A You can also tag your devices. If your campus consists of multiple buildings, you can tag the devices deployed on your campus. Building1 or Lobby You can label it as:.
If devices in a specific location or a specific zone within a specific location should have similar configurations, you can group them together.
Create a site
You can create a new site by clicking the Site menu in the Organization menu on the left.
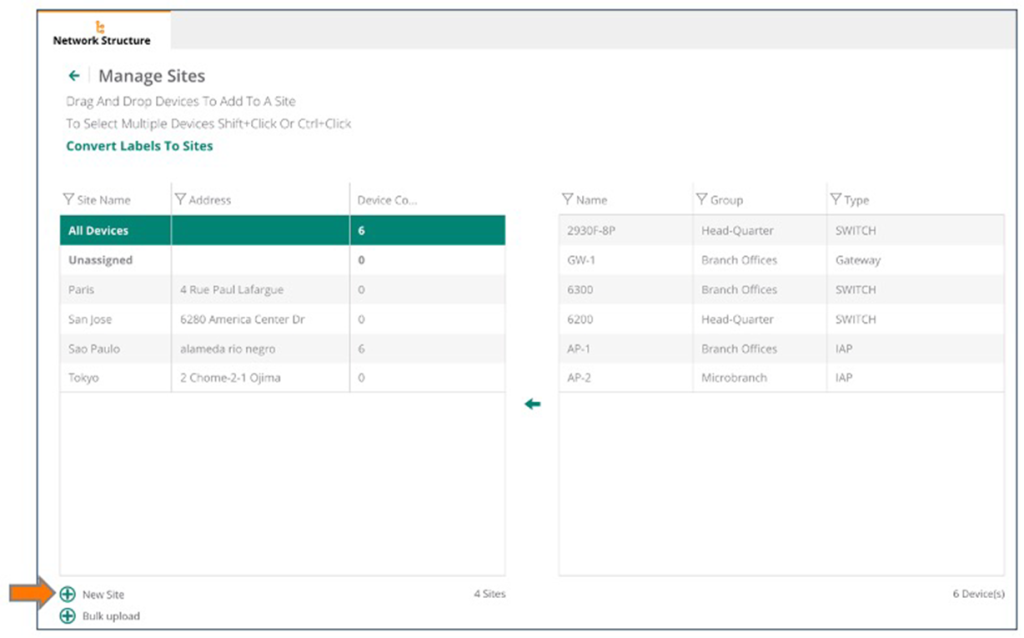
When creating multiple sites, you can also create multiple sites at once by uploading files.
The uploaded file must be an Excel file containing the site's name, address (including city, state, country, and zip code).
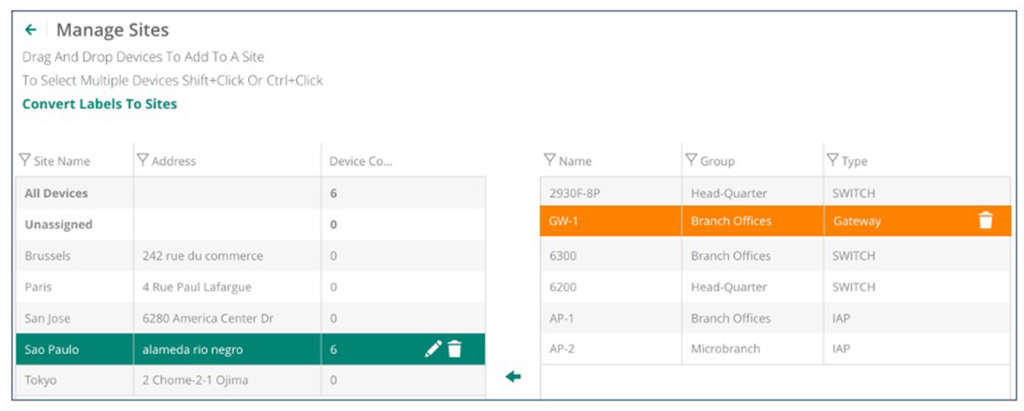
Once you've created a new site, simply drag your device over it.
※ A device can only belong to one site.
When creating a new site, you will need to provide a site name, address, city, country, and region.
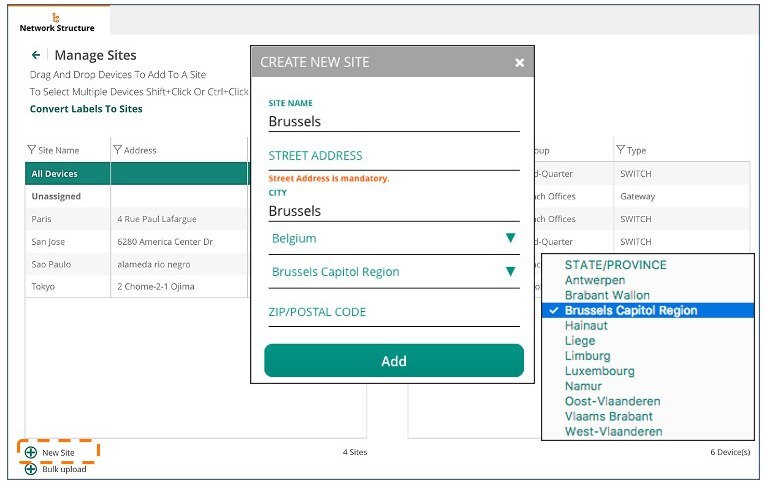
The more information you add, the more accurately your site will appear on the map.
Most of the information is required, but the zip code is not required.
※ reference: VisualRF, which we'll cover later in this course, doesn't currently support hierarchical arrangements of locations.
If your campus has more than one building, we recommend creating an Aruba Central site for each building.
Moving devices on the site
You can move devices between sites by selecting the devices you want to move and dragging and dropping them to the destination site.
Many services use site information to plan and manage devices and various tasks.
Therefore, all devices must be placed in the correct site to ensure that the service runs properly.
Network status dashboard based on site information
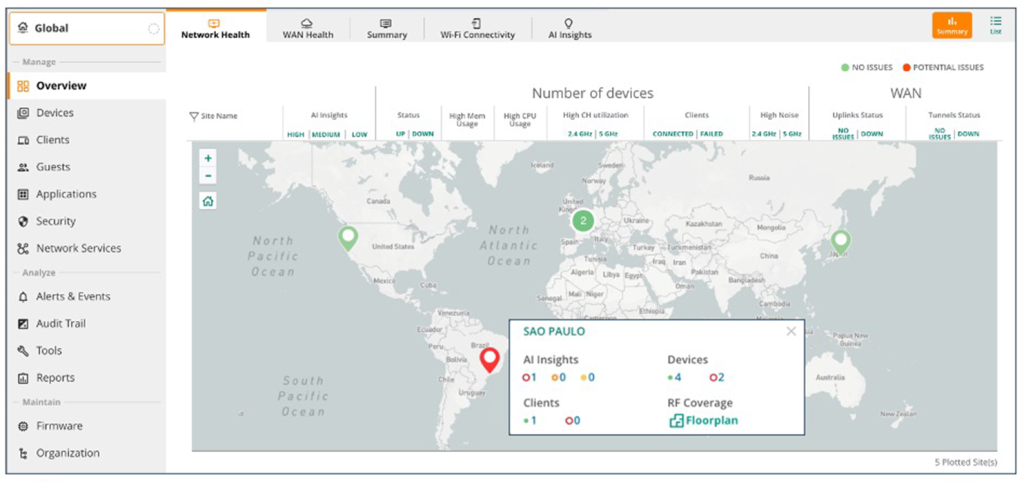
When you enter the exact address, each site will be displayed on a map along with its network status.
This map provides an overview of various network sites.
Sites are colored red or green. Red indicates potential problemsrepresents Green is no problemIt represents.
Click on a site on the map to see details about all issues at that site.
You can also zoom in on the site to see it in Street View.
Label
Labels are in the network Tags attached to provisioned devicesno see.
This tag can be used to filter devices for monitoring, management, and reporting purposes.
A device may have multiple labels, each helping to identify the device's ownership, department, and function.
For example, there may be devices that each manage multiple buildings in a city. In this case, BLD-1-FLR-1 If you create a label called "Building 1, 1st Floor," all devices on that floor will be linked to that label. Selecting this label will display only the devices linked to that label.
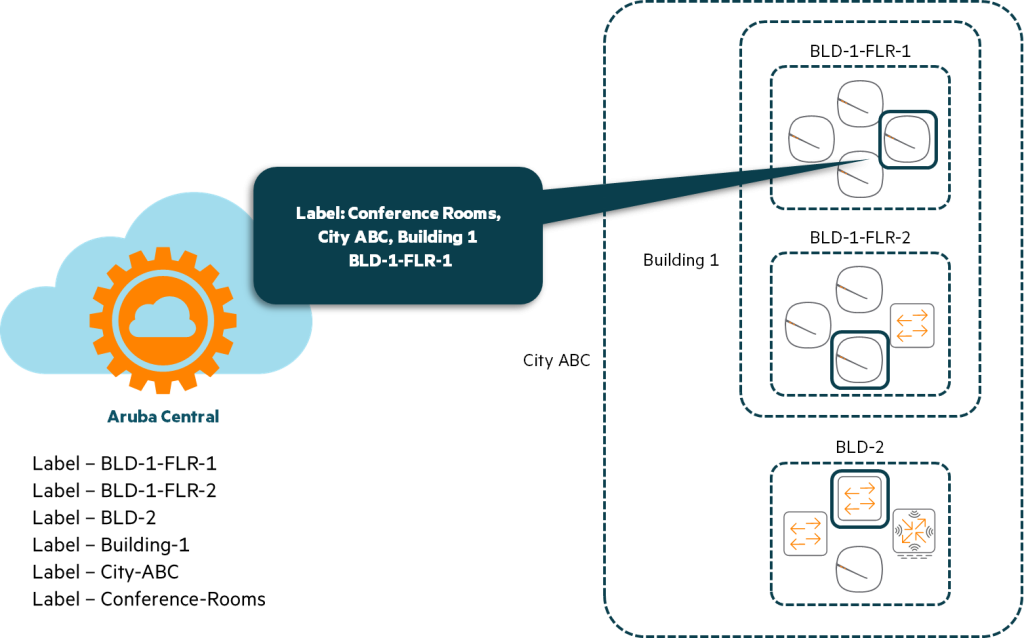
In this example, the device on the second floor has BLD-1-FLR-2 Use the label, and the device in Building 2 BLD-2 Use labels.
To see only the devices in that building Building 1 I created an additional label.
To check all devices in a given city (ABC), use the label (City-ABC) just need to be created.
We can break it down further. Looking at the picture above, we can see labels for the devices in the conference room (Conference Rooms) has also been added.
When you select a label, Central displays only those devices.
The top selected AP is Conference Rooms, City-ABC, Building 1, BLD-1-FLR-1 These fall into four labels:.
These tags will allow you to instantly identify the location of a device within a corporate campus or building.
You can also identify devices located in the lobbies of other buildings within the same campus.
All IAPs in the lobby Lobby By labeling it as such, you will be able to filter and monitor IAPs in the lobbies of all campus buildings.
Create a label
You can create new labels on the Labels page (Organization > Labels).

To assign a label to a device, select one or more devices and drag and drop them onto the desired label to assign it to the device.
One device is Can have multiple labelsRemember that.
Filtering
The context filter in the top left displays several GUI pages, such as Monitoring and Reporting.
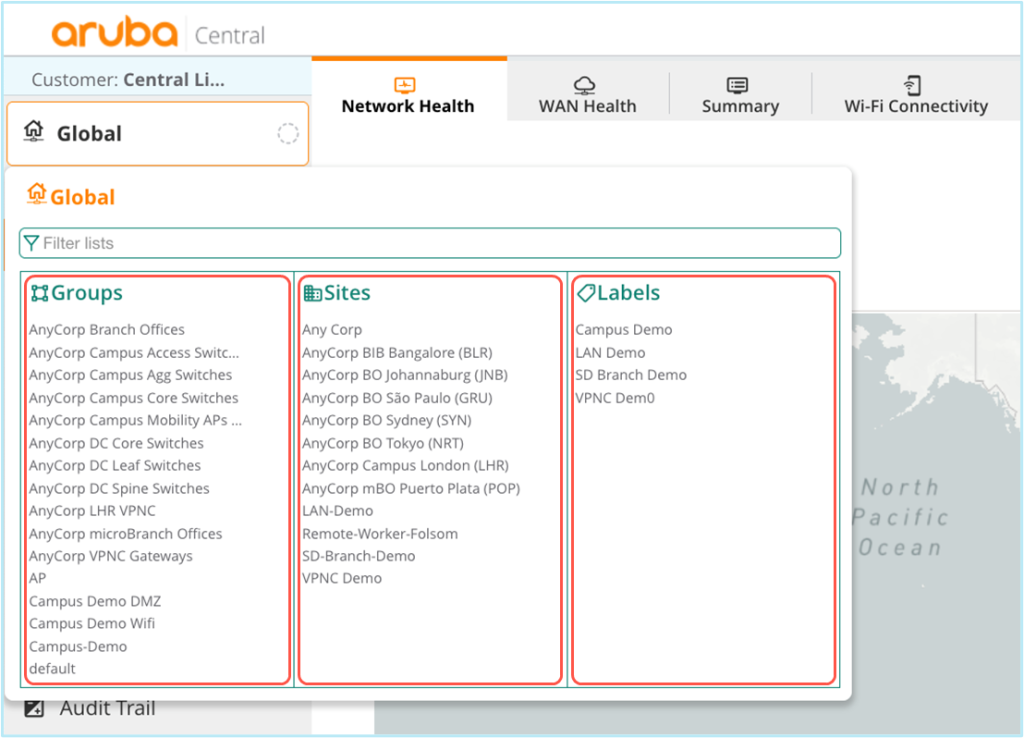
You can use this to minimize the items you need to monitor or configure.
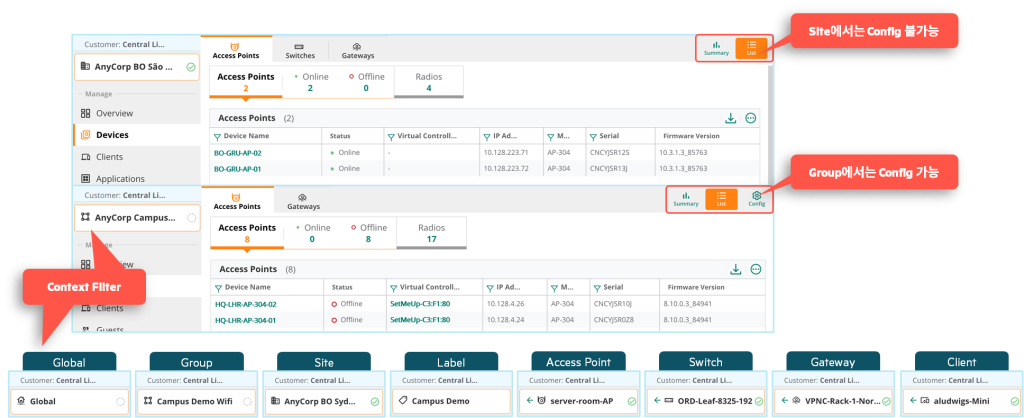
groupYou can also monitor all devices in, groupYou can also configure multiple devices at once via .
LabelYou can use it to monitor specific areas.
also SiteYou can use it to monitor specific sites as well as track the installation status of those sites.
※ reference: It is not possible to change the device's configuration on the site.
Aruba Central is a cloud-based network management platform.
The nature of the cloud allows you to add and manage a large number of devices from various locations.
Managing these diverse types of devices requires an effective and efficient method.
Aruba Central provides various management methods for administrator convenience.